- Have any questions?
- [email protected]
Mastering Appium Commands: A Beginner’s Guide to Automation Scripts

How to Win Friends & Influence People: Mastering Interpersonal Skills
June 5, 2024
Mastering the Job Interview: Common Interview Questions and How to Answer Them, Tips for Virtual Interviews
June 10, 2024In the world of mobile app testing, Appium stands out as a powerful open-source tool that enables the automation of mobile applications across various platforms. Understanding and using Appium commands effectively is crucial for writing robust automation scripts. In this tutorial, we will explore the essential Appium commands and guide you through the process of creating your first automation script.
What is Appium?
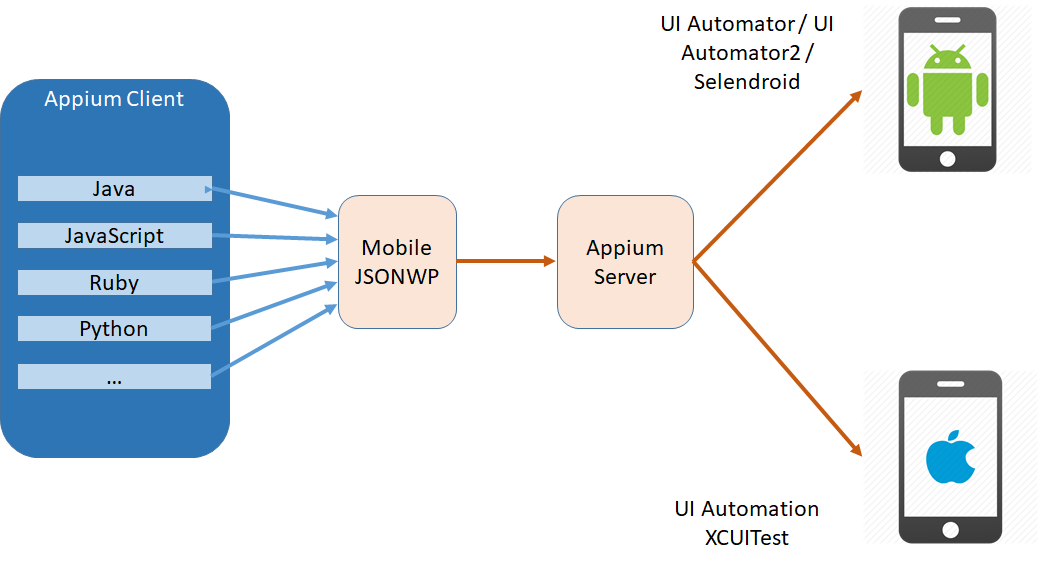
Appium is an open-source automation tool for testing mobile applications on both Android and iOS platforms. It allows testers and developers to write automation scripts using a wide range of programming languages, such as Java, JavaScript, Python, and Ruby. Appium leverages the WebDriver protocol to interact with mobile devices, providing a consistent and flexible framework for mobile automation.
Setting Up Appium
Before diving into Appium commands, you need to set up your Appium environment. Here’s a quick guide:
1. Install Node.js and NPM:
– Download and install Node.js from the official Node.js website. NPM (Node Package Manager) comes bundled with Node.js.
2. Install Appium:
– Open your terminal or command prompt and run the following command to install Appium globally:

3. Install Appium Doctor:
– Appium Doctor helps ensure all dependencies are correctly installed. Install it using the command:

– Run Appium Doctor to check your setup:

4. Start Appium Server:
– Launch the Appium server by running:

– You should see a message indicating that the Appium server is running.
Understanding Appium Commands
Appium commands are essential for interacting with mobile applications. They allow you to perform actions such as launching the app, interacting with UI elements, and verifying application behavior. Here are some basic Appium commands to get you started:
1. Session Commands:
– Creating a Session: Establishes a connection to the Appium server and starts a new session.

2. Element Commands:
– Finding an Element: Locates an element using a selector strategy.

– Interacting with an Element: Performs actions on the located element.

3. Gestures and Touch Actions:
– Tap: Simulates a tap action on an element.

– Swipe: Performs a swipe gesture on the screen.

4. Verification Commands:
– Get Text: Retrieves the text from an element.

– Assert Conditions: Verifies that certain conditions are met.

Writing Your First Automation Script
Let’s create a simple script that launches an app, interacts with a button, and verifies the button’s label.

Replace /path/to/your/app.apk with the actual path to your APK file and buttonAccessibilityId with the appropriate accessibility ID of the element you want to interact with.
Mastering Appium commands is essential for creating effective automation scripts. By understanding and utilizing these commands, you can automate a wide range of interactions within your mobile applications, improving testing efficiency and coverage. Start experimenting with Appium commands and take your mobile automation to the next level!


